You get 80s hair by building volume at the root, teasing a hidden structure underneath, shaping the top layer with rollers or a large-barrel iron, and locking everything with a strong-hold spray. Skip any one of those four moves and the look falls flat by lunch. Here's the fast version before we get into the details.
- Prep: Apply a root-lift mousse to damp hair and rough-dry with your head flipped forward for lift.
- Build: Section hair and backcomb the crown and mid-lengths to create a teased cushion.
- Shape: Curl the top layer with large rollers, a 1 to 1.5 inch curling iron, or a triple-barrel waver.
- Lock: Finger-tease the surface smooth and set with an extra-strong hairspray.
Quick tools checklist: root-lift mousse, heat protectant, metal round brush, large-barrel curling iron or hot rollers, a teasing comb, and a strong-hold hairspray. That's the whole kit. Everything else in this guide is about doing each step better.
Key Takeaways
Getting 80s hair at home comes down to root lift, hidden teasing, a shaped top layer, and a strong-hold finish applied in that exact order.
| Point | Details |
|---|---|
| Prep before you style | Apply heat protectant and mousse to damp hair, then rough-dry with your head flipped forward for lift. |
| Pick one look first | Choose a single style, like a feathered blowout or big barrel curls, instead of blending several techniques. |
| Tease the base, not the surface | Backcomb mid-lengths at the crown, then smooth the top layer over it for hidden structure. |
| Protect hair every time | Use heat protectant on every hot tool pass and space perms several months between perms to let hair recover apart. |
| Book a pro for perms or events | VÉLOURA Beauty On Demand connects you with licensed stylists for perms, color, or bridal-ready 80s looks. |
Table of Contents
- Which 80s Hairstyle Should You Recreate?
- How Do You Prep Hair for an 80s Style?
- Step-by-Step Methods: Blowout, Rollers, Teasing, and Crimping
- How Do You Adjust 80s Hair Techniques for Your Hair Type?
- How Long Does 80s Hair Take, and What Does It Cost?
- What Do Stylists Say About Getting 80s Hair Right?
- When Should You Book a Professional for 80s Hair?
- Why We Believe in Softer, Smarter 80s Hair
- Book an On-Demand Stylist for Your 80s Hair Day
- Sources
- FAQ
Which 80s Hairstyle Should You Recreate?
Trying to combine every 80s trend at once is how you end up with a mess instead of a look. Pick one silhouette and build your technique around it.
- Feathered blowout (Farrah style): Best for medium to long layered hair with some natural body; softened today with looser curls instead of a stiff, sprayed shell.
- Big barrel curls: Best for medium to long hair, any texture; modernized with looser, brushed-out ringlets instead of tight, uniform coils.
- Crimped or wavy texture: Best for fine to medium hair that needs visual thickness; today's version uses crimping on underlayers only, not the whole head.
- High side ponytail with a scrunchie: Best for long hair or hair with extensions; keep the crown teased but the ponytail itself smooth for a cleaner update.
- Mullet, wolf cut, or shag: Best for hair that already has heavy layering; this one barely needs updating since it never really left.
- Half-up high pony: Best for short-to-medium hair that can't hold a full ponytail; the volume lives at the crown, not the length.
A cut with real layering and lift at the crown makes almost any of these easier to execute, according to Elle, which notes that layers and volume were the two constants across every popular 80s style. If your current cut is one length with no layers, talk to your stylist before you reach for a curling iron. Feathered, face-framing layers in particular are what gave the Farrah Fawcett look its shape, and that same cut translates cleanly into a softer, modern blowout.
How Do You Prep Hair for an 80s Style?
The prep work matters more than the styling itself. Skip it and no amount of teasing will hold.
- Cleanse with a volumizing shampoo, focusing product at the roots rather than the ends.
- Condition mid-lengths to ends only. Roots need grip, not slip.
- Apply a heat protectant to damp hair before any hot tool touches it. Drybar Hot Toddy Heat Protectant Mist is a solid pick for this step.
- Work a volumizing mousse through the roots. IGK Big Time Volume Thickening Mousse or Got2b Volumaniac Bodifying Hair Mousse both give a strong base without feeling stiff.
- Rough-dry with your head flipped forward using a diffuser or a blow dryer with a concentrator nozzle.
- Once dry, mist in Living Proof Full Dry Volume Texturizing Spray for grip before you tease or curl.
Your tool kit should include a metal round brush for tension, a large round brush for smoothing, hot rollers, a 1 to 1.5 inch curling iron, a triple-barrel waver or crimper, a diffuser attachment, and a blow dryer with a cool-shot setting. Metal round brushes conduct heat better than wood or ceramic ones, which gives you the tighter, more lift-oriented shape that defines a proper 80s blowout.
Pro Tip: Style on second-day hair whenever you can. Freshly washed hair is often too slippery to hold a tease, while hair with a little natural oil grips backcombing far better and needs less product to stay put.
Step-by-Step Methods: Blowout, Rollers, Teasing, and Crimping
Each technique below builds a different part of the look. Most full 80s styles combine at least two.
Feathered blowout
- Section hair into four quadrants, starting at the crown.
- Blow-dry each section with a metal round brush, rolling the ends under and away from the face.
- Direct heat at the roots first for lift, then finish the mid-lengths and ends.
- Finish with a cool shot to set the shape before releasing the brush.
Large-barrel curls (rollers or iron)
- Section hair into 1.5 to 2 inch pieces.
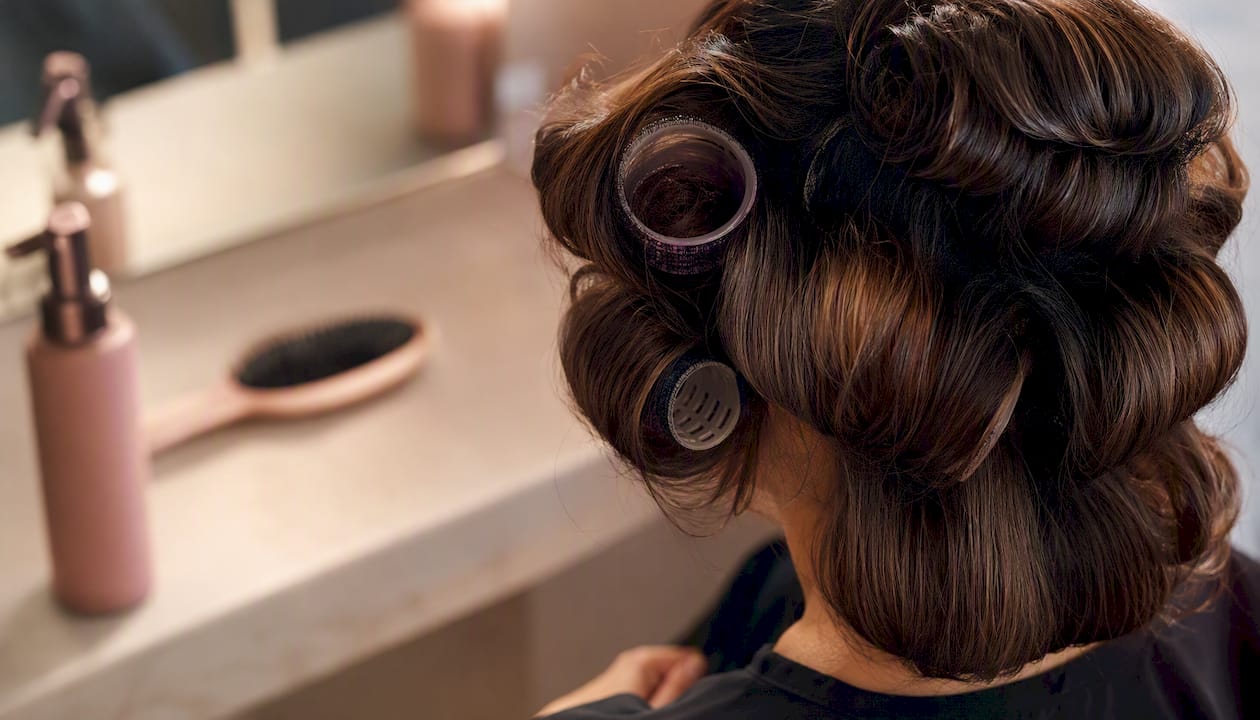
- Wrap each section around a large hot roller or a 1 to 1.5 inch curling iron, holding for 8 to 10 seconds per section on medium heat.
- Let rollers cool completely before removing them. This is what makes the curl last.
- Brush out gently with a large round brush for a soft, blended wave instead of tight ringlets.
Teasing and backcombing
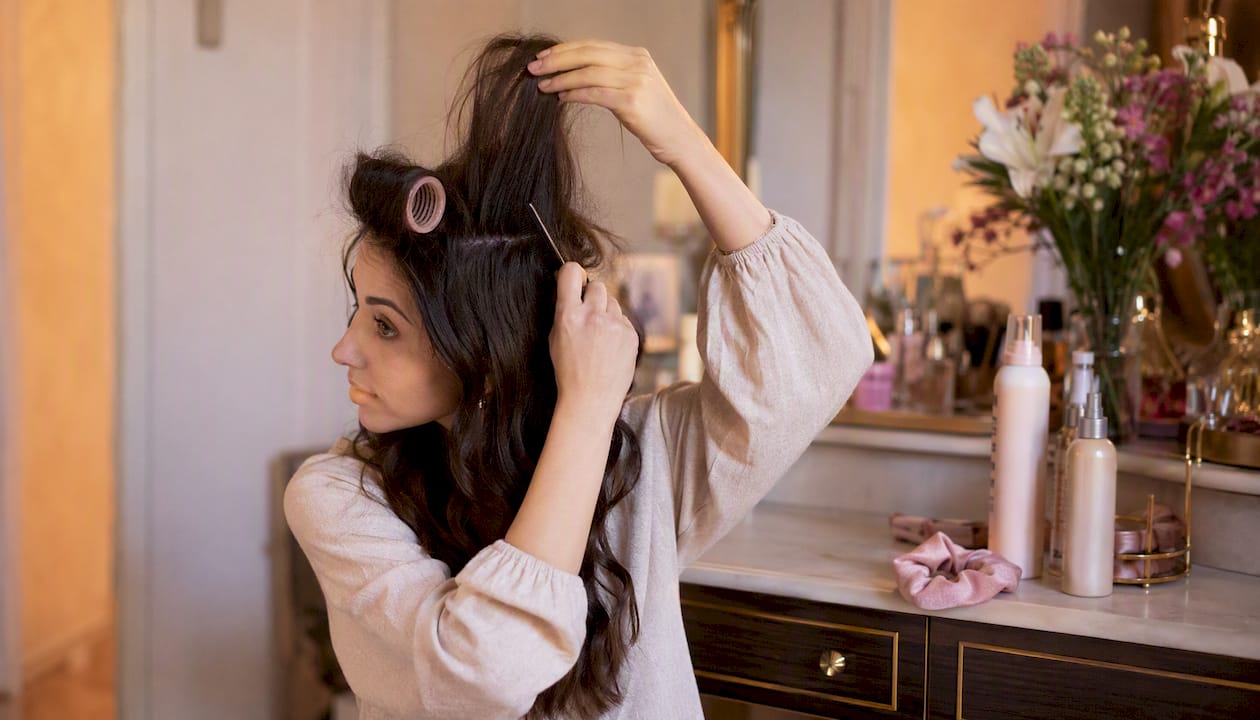
- Section off the crown and mid-lengths, clipping the top layer out of the way.
- Hold a small section straight up and backcomb from mid-shaft toward the root with a fine-tooth comb.
- Repeat across the crown, building height in layers rather than one heavy pass.
- Smooth the top layer over the teased base with a brush or your fingers, leaving the structure underneath intact.
Waver or crimp technique
- Section the underlayers only, leaving the top layer smooth for coverage.
- Clamp small sections in a triple-barrel waver or crimper for 5 to 8 seconds each.
- Let the crimped sections cool before releasing to lock the zigzag pattern.
- Layer smooth top hair over the crimped underlayers for hidden volume with a sleek finish on top.
Perm vs. heatless methods Perms were the backbone of authentic 80s texture, and modern perm formulas condition better than the 1980s versions did, according to Allure. A perm gives you weeks of texture without daily styling, but it's a chemical process with real commitment and upkeep. Heatless methods like flexi rods or foam rollers, set on damp hair and left overnight, get you close to a poodle-curl or barrel-curl look with far less risk, as Glam points out. Heatless takes more patience but does no lasting damage.
| Method | Best For | Hold Level | Damage Risk | Time to Achieve | Approximate Cost |
|---|---|---|---|---|---|
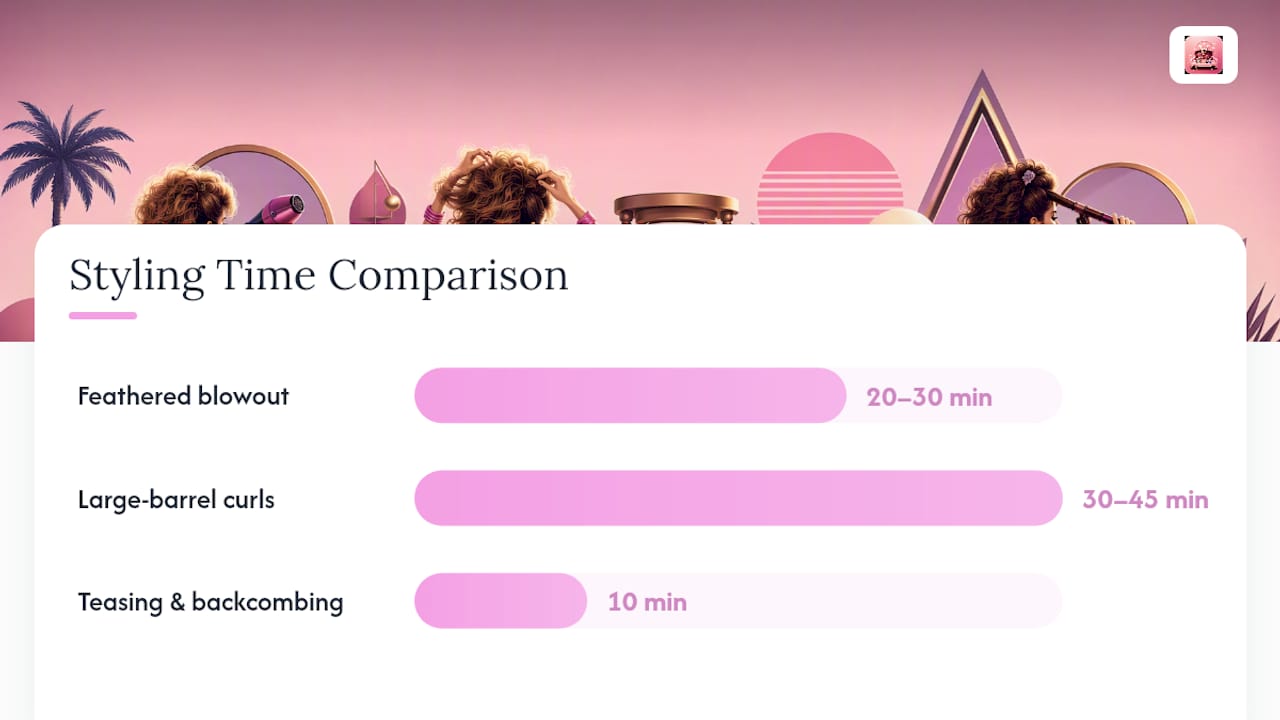
| Feathered blowout | Layered medium to long hair | Medium | Low to medium (blow dryer heat) | about twenty to thirty minutes | $60 salon |
| Large-barrel curls | Any length with layers | Medium to strong | Medium (repeated hot tool use) | half an hour to three-quarters of an hour | twenty to forty dollars for tools purchased for home use; between seventy and one hundred dollars for salon styling |
| Teasing and backcombing | Fine to medium hair needing height | Strong | Low if done sparingly | 10 minutes | Under $10 DIY; included in most salon styling |
| Waver or crimp | Fine hair, hidden underlayers | Strong | Medium (direct heat contact) | quarter of an hour to just under half an hour | thirty to fifty dollars for a tool purchased for home use; $80 salon |
| Perm vs. heatless set | Anyone wanting lasting texture | Strong (perm), medium (heatless) | Medium to high (perm), low (heatless) | two to three hours for a perm, overnight for heatless methods | $80 salon perm; less than fifteen dollars for DIY heatless methods |
Pro Tip: Never exceed 400 degrees Fahrenheit on fine or color-treated hair, and always apply heat protectant before rollers, irons, or wavers touch your strands. Stylists who focus on damage-aware styling stress that heat protection and limiting how often you tease are what keep 80s volume from wrecking your hair over time, per Glam.
How Do You Adjust 80s Hair Techniques for Your Hair Type?
- Fine hair: Lean on backcombing and a lightweight mousse like Got2b Volumaniac. Skip heavy creams that weigh roots down and flatten your lift by midday.
- Thick or coarse hair: Large rollers and a triple-barrel waver hold shape well here. A richer smoothing serum on the ends keeps frizz down without softening your teased crown.
- Curly or natural hair: Diffuse on low heat and use a curl cream instead of mousse to define your existing texture rather than fighting it with a flat iron.
- Very straight hair: Teasing needs a stronger grip product, so mist in a texturizing spray before backcombing so the tease actually catches.
- Short or pixie hair: Skip the ponytail and roller looks. Focus on root-lift mousse plus a crimped or waved top layer for instant height without needing length.
How Long Does 80s Hair Take, and What Does It Cost?
Sealing the look matters as much as building it. Once your curls or waves are set, use a cool shot from your blow dryer to lock the shape before you touch it further. Finger-tease the surface layer instead of brushing it out completely. Brushing too hard collapses the teased structure underneath. Spray hairspray in sections, holding the can 10 to 12 inches away, and focus at the roots and crown where you need the most hold. The teased base should stay hidden under a smoothed top layer, not visible as a separate texture.
- Limit teasing to once or twice a week to avoid cumulative breakage.
- Space out perms by at least several months between perms to let hair recover to let hair recover between chemical processes.
- Apply heat protectant every single time you use a hot tool. No exceptions, even for a quick touch-up.
| Method | DIY Time | Approximate Cost Range |
|---|---|---|
| Blowout only | about twenty to thirty minutes | up to fifteen dollars for products you likely already own |
| Rollers or curling iron | half an hour to three-quarters of an hour | twenty to forty dollars for tools |
| Teasing plus finish | 10 minutes added | Under $10 |
| Waver or crimp underlayer | quarter of an hour to just under half an hour | thirty to fifty dollars for a crimper |
| Salon blowout with volume styling | forty-five to sixty minutes | sixty to one hundred dollars |
| Salon perm | two to three hours | $80 depending on length |
Pro Tip: Keep a travel-size Drybar Hot Toddy Heat Protectant Mist in your bag for touch-ups. Reapplying before you re-curl a fallen section during a long event protects hair just as much as your first application did that morning.
What Do Stylists Say About Getting 80s Hair Right?
Modern 80s hair is softer than the original. Stylists consistently point to definition and movement over the crunchy, heavily lacquered finish that defined the actual decade, according to Allure.
"The most popular hairstyles in the 80s had two things in common: layers and volume." That single idea, cited by Elle, explains why a good cut does more work than any product ever will.
The most common mistakes are easy to fix once you know what to look for. Over-teasing the entire head instead of just the crown creates a fuzzy, uncontrolled shape rather than structured height. Using a wooden or ceramic brush instead of a metal round brush during blowouts smooths hair too much and kills the lift you're trying to build. Skipping heat protectant is the fastest way to turn a fun retro look into weeks of dry, brittle ends. And piling on heavy pomades or oils flattens the exact volume the whole style depends on.
For high-impact height without visible damage, try hidden crimping on the underlayers only, or layer root-lift product application in two passes, once at the root before drying and again right before you tease. Velcro rollers left to cool completely, plus a cool shot at the end of your blowout, are two of the simplest shortcuts for hair that stays lifted for hours instead of minutes.
When Should You Book a Professional for 80s Hair?
Some parts of this look are genuinely DIY-friendly. Others aren't worth the risk to your hair or your event photos.
- Book a pro for a perm. Chemical processing needs a trained hand and the wrong formula can cause real damage.
- Book a pro for color or bleach work. Achieving an authentic 80s tone often means lightening, and that's not a bathroom-sink project.
- Book a pro for complex shaping or a cut with heavy layering. A bad layer job is hard to fix at home and even harder to undo.
- Book a pro for weddings or big events. You want the style to survive photos, dancing, and a full night out, not just the first hour.
When you're booking, ask the stylist directly about their experience with retro or vintage-inspired styling, which specific products they plan to use on your hair type, and their policy on timing and cancellations. A stylist who works through VÉLOURA Beauty On Demand's mobile hair styling service can walk you through all of this before the appointment even starts, right in your own bathroom mirror.
Why We Believe in Softer, Smarter 80s Hair
The 80s were never subtle, and there's nothing wrong with that. But recreating the decade doesn't mean punishing your hair with the same heavy alcohols and stiff, crunchy sprays that were the only option back then. Modern mousses, root-lift sprays, and heat protectants let you build the same dramatic silhouette with a fraction of the damage, and that's the version worth wearing in 2026. VÉLOURA Beauty On Demand connects clients with licensed, vetted hairstylists who already know how to balance nostalgia with hair health, which matters most when the style you want involves this much teasing, heat, and product layering.
Book an On-Demand Stylist for Your 80s Hair Day
Getting a feathered blowout or a full teased-and-curled look exactly right takes practice, the correct tools, and a hand that isn't your own trying to see the back of your head in a mirror. VÉLOURA Beauty On Demand sends a licensed, vetted hairstylist directly to your home, hotel, or office in Los Angeles, Miami, or New York, so you get salon-level 80s volume without driving anywhere or waiting for an appointment slot.
Whether you're recreating a full 80s theme for a party or building bridal hair with a retro twist, a stylist can bring rollers, a professional curling iron, and the right root-lift products straight to you. Check availability and book an on-demand hairstylist in Los Angeles today, or explore bridal and event hair styling if your 80s moment is part of a bigger celebration.
Sources
- The Best Hair Looks of the '80s | Elle
- 80s hair inspiration — how stylists update the look | Allure
- The Most Iconic '80s Hairstyles (& Our Damage-Free Tips To Get Them Yourself) | Glam
FAQ
How do I get my hair to look like the 80s?
Build volume with a root-lift mousse, tease the crown and mid-lengths, shape the top layer with large rollers or a curling iron, and lock it all with a strong-hold hairspray.
How can I recreate an 80s look at home?
Choose one iconic style, like a feathered blowout or big barrel curls, then follow the prep, tease, and shape sequence with tools you likely already own, such as a round brush and curling iron.
How did people get their hair so big in the 80s?
Teasing plus root-lift products created a structural cushion under smooth top layers, and heavy-hold hairsprays locked the shape in place for hours.
How did girls wear their hair in the 80s?
Common styles included feathered layers, big barrel curls, crimped texture, high side ponytails with scrunchies, and shaggy mullet-inspired cuts, almost always built on a layered base with volume at the crown.
Should I DIY my 80s hairstyle or book a stylist?
DIY works well for blowouts, curls, and teasing, but a perm, color change, or bridal-ready style calls for a licensed professional, and VÉLOURA Beauty On Demand can send one directly to you.