Fairy makeup is an ethereal, shimmer-forward style built on four pillars: dewy "glass" skin, iridescent highlights, pastel or nature-inspired color palettes, and whimsical accents like face gems and cosmetic glitter. According to Lipstick Queen, the look spans a wide spectrum — from a soft, wearable glow you'd wear to a daytime festival to a full theatrical transformation for a photoshoot. The fastest way to get there:
- Prep: Apply a hydrating primer (Neutrogena's Hydro Boost line works well) or a sheer skin tint from Kosas
- Eyes: Press a sheer iridescent shadow onto lids with your fingertip
- Cheeks: Layer a liquid cream highlighter on cheekbone high points
- Finish: Dot cosmetic-grade gems where light naturally catches — inner corners, temples, or the bridge of your nose
That four-step micro-recipe is the foundation. Everything below builds on it.
Table of Contents
- What products do you need for fairy makeup?
- How to do fairy makeup step by step
- Four fairy look variations you can recreate fast
- How to make fairy makeup last and remove it safely
- When does it make sense to hire a mobile makeup pro?
- Key Takeaways
- The mistake that ruins most fairy looks (and how to fix it)
- Want a pro to create your fairy look?
- Useful sources
- FAQ
What products do you need for fairy makeup?
Getting the right kit together before you start saves time and prevents mid-look panic. Here's what you actually need, with US-available brand examples for each category.
Skin and base products
- Hydrating primer: — Neutrogena Hydro Boost Hydrating Makeup Primer or Charlotte Tilbury's Flawless Filter
Eyes and lips
- Sheer iridescent or duochrome eyeshadow: NYX Professional Makeup Glitter Goals Liquid Eyeshadow or KIKO Milano Sparkling Slate Eyeshadow Palette
- Cosmetic-grade glitter: NYX Professional Makeup Face & Body Glitter (never craft glitter near the eyes)
- Cream or glossy lip product: Kosas Wet Lip Oil Gloss or a sheer tinted balm
- Mascara and optional natural false lashes
Embellishments and adhesives
- Face gems and rhinestones: available at beauty supply stores; pair with gemstone-inspired accents for a cohesive look
Tools
- Dense blending brush for eyeshadow
- Flat press brush for packing glitter
- Damp beauty sponge or fingertips for cream products
- Small detail brush for liner or precise gem placement
- Tweezers for placing gems cleanly
- Spoolie for brows
- Lash curler
Pro Tip: Buy a travel-sized priming setting spray and keep it in your bag at events. A quick spritz mid-day refreshes the glow without disturbing gems or glitter.
| Product Type | US Brand Example | Price Range |
|---|---|---|
| Hydrating primer | Neutrogena Hydro Boost Primer | Budget |
| Luminizing base | Charlotte Tilbury Flawless Filter | Mid-high |
| Sheer skin tint | Kosas Tinted Face Oil | Mid |
| Cream blush | KIKO Milano Creamy Blush | Budget-mid |
| Iridescent shadow | NYX Glitter Goals Liquid Shadow | Budget |
| Cosmetic glitter | NYX Face & Body Glitter | Budget |
According to Charlotte Tilbury's Halloween tutorials, layering lightweight luminous products rather than heavy matte formulas is what separates a flat costume look from a genuinely magical one.
How to do fairy makeup step by step
This base tutorial creates a wearable, photo-ready ethereal look. Work through each stage in order.
-
Cleanse and moisturize. Start with clean, hydrated skin. Apply a lightweight moisturizer and let it absorb fully. If you're wearing this look outdoors during the day, layer an SPF underneath — a mineral SPF in your routine won't disrupt the dewy finish the way heavy sunscreens can.
-
Apply a hydrating primer. A water-gel primer like Neutrogena Hydro Boost creates the smooth, plump canvas that makes iridescent products pop. Let it set for 60 seconds.
-
Build a sheer, luminous base. Mix a few drops of liquid illuminator directly into your skin tint or lightweight foundation. Apply with a damp sponge using a pressing motion. Spot-conceal only where necessary — the goal is skin that looks lit from within, not covered.
-
Set strategically. Press a thin veil of translucent powder only on the T-zone if needed. Leave cheekbones, temples, and the brow bone completely bare so highlighter adheres and glows.
-
Create the eye look. Use your fingertip to press a sheer iridescent or duochrome shadow across the entire lid. Blend upward with a soft brush so edges dissolve rather than stop sharply. Add a brighter shimmer or glitter to the inner corner and lower lash line. The ĀTHR Beauty guide notes that diffused, watercolor-like application is the defining technique — precision works against the look.
-
Line lightly (optional). If you want definition, use a soft brown or champagne liner along the upper lash line. Skip the sharp black wing entirely; it reads too graphic for the enchanted aesthetic.
-
Apply cream blush. Smile and tap cream blush onto the apples of your cheeks, then blend upward toward the temples with your fingertip. This mimics a natural wind-kissed flush rather than a sculpted contour.
-
Highlight. Dab liquid highlighter on cheekbone high points, the brow bone, the inner corners of the eyes, and the cupid's bow. Blend with a fingertip for a glass-skin effect.
-
Apply glitter safely. Using a flat press brush or fingertip, press cosmetic-grade glitter over a glitter adhesive gel on the lid or cheekbone. Never blow glitter onto your face — press it on. Keep loose glitter away from the waterline.
-
Place gems. Dip tweezers into lash adhesive, pick up each gem, and press it firmly onto skin for 10 seconds. Start at the inner corner or cheekbone and work outward.
-
Set the look. Finish with a long-hold setting spray held 8–10 inches from your face. Let it dry naturally without touching.
-
Add lips. A glossy sheer lip or tinted balm completes the look. Keep it soft — the eyes and skin are the focal point.
Pro Tip: After blending eyeshadow, take a clean fluffy brush and sweep it over the edges with zero product. This "erases" any hard lines and gives the watercolor effect that defines fairy makeup.
For visual learners, search "fairy makeup tutorial" on YouTube or TikTok — Today.com's roundup of 17 fairy makeup tutorials is a strong starting point for finding video walkthroughs at every skill level.
Four fairy look variations you can recreate fast
Once you have the base down, switching between these four moods is mostly a color swap. Each recipe below adapts to day festivals, night parties, or photoshoots.
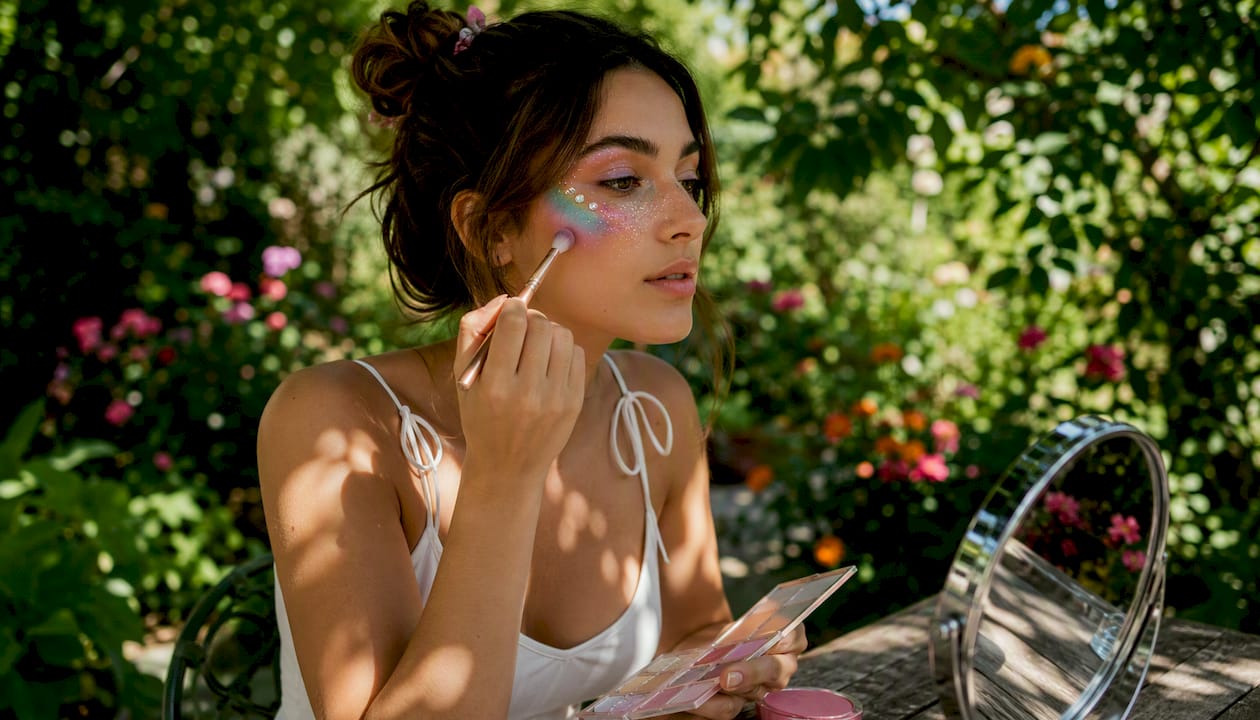
Moonlit fairy
Color story: Icy blues, silvers, and cool whites. Think moonlight on water.
- Lid: sheer silver or pale blue duochrome shadow, blended to the brow bone
- Inner corner: bright white or icy silver shimmer for maximum light reflection
- Cheeks: cool-toned liquid highlighter (silver or pearl finish)
- Lips: clear gloss or barely-there nude
- Gems: clear or iridescent rhinestones clustered at the inner corner and temple
Best for: Nighttime events and photoshoots where studio or ring-light catches the silver tones. The ĀTHR Beauty breakdown of fairy variations confirms that cool icy palettes photograph especially well under artificial light.
Woodland fairy
Color story: Mossy greens, warm bronzes, and earthy terracottas.
- Lid: olive or forest green shadow, blended with warm bronze at the outer corner
- Faux freckles: use a fine brow pencil or freckle pen to dot across the nose and cheeks
- Cheeks: warm peach or terracotta cream blush
- Lips: a sheer berry or warm nude gloss
- Accents: pressed dried flowers or leaf-shaped gems along the cheekbone
Best for: Outdoor daytime festivals. The earthy palette reads naturally in sunlight without looking washed out.
Dark fairy
Color story: Smoked-out shimmer with deep berry and plum tones.
- Lid: deep plum or charcoal shimmer, blended with soft edges (not a hard smoky line)
- Lower lash line: a smudged burgundy or dark bronze shadow
- Cheeks: deep berry cream blush, blended high
- Lips: a sheer berry or wine gloss — keep it glossy, not matte, to preserve the ethereal quality
- Gems: dark amethyst or black rhinestones at the outer corner
Best for: Evening parties and Halloween events. The key is keeping edges soft — a harsh line turns this into a standard smoky eye and loses the enchanted atmosphere.
Crystal/Cosmic fairy
Color story: Prismatic duochrome pigments, holographic glitter, and star motifs.
- Lid: a color-shifting duochrome pigment (purple-to-teal or rose-to-gold) pressed with a flat brush
- Center lid: a cluster of fine holographic cosmetic glitter for maximum sparkle
- Cheeks: a rose-gold or holographic highlighter
- Lips: a metallic or holographic lip gloss
- Gems: clustered rhinestones in varying sizes at the cheekbone and brow bone; add star-shaped gems for a cosmic detail
Best for: Photoshoots and editorial looks. Duochrome pigments shift color with movement, which reads beautifully on camera.
How to make fairy makeup last and remove it safely
Layering for longevity
A fairy look that fades by hour two is a common frustration. The fix is in the layering sequence, not the products themselves.
- Start with a grip primer under your base
- Use cream products for blush and highlight, then set with the thinnest possible veil of translucent powder
- Seal cosmetic glitter with a glitter adhesive gel or mixing medium before pressing it on; this prevents fallout throughout the day
- Finish with a water-resistant long-hold setting spray
For multi-hour events, carry a travel setting spray for touch-ups. A single spritz reactivates the glow without disturbing gems.
Safe removal
Removing fairy makeup correctly protects your skin and your eyes.
- Start with an oil-based makeup remover or cleansing balm. Press it gently over glitter and gems — the oil dissolves both cosmetic glitter and most adhesives without scrubbing.
- Use a dedicated spirit gum remover if you used spirit gum for prosthetics or larger gems.
- Follow with a gentle cleanser. Neutrogena's Ultra Gentle Daily Cleanser is a reliable option for post-event skin that may be sensitive from adhesive contact.
- Moisturize immediately after cleansing.
Safety cautions
Cosmetic-grade glitters are the only safe option near the eyes — craft glitters have sharp edges that can scratch the cornea. Check every glitter's label before purchasing.
- Never apply loose glitter directly to the waterline
- If you wear contact lenses, remove them before applying any glitter or gems near the eye area, and reinsert only after the look is fully set and fallout is cleared
- Patch-test new adhesives on your inner wrist 24 hours before use
- Avoid prosthetic adhesives on broken or irritated skin
When does it make sense to hire a mobile makeup pro?
DIY fairy makeup works beautifully for casual parties and festivals. But some scenarios genuinely call for a licensed professional.
What a licensed mobile pro handles
- Full skin prep and primer application
- Prosthetic ear or SFX element blending (spirit gum application, seam concealing)
- Cosmetic-grade adhesive application for gems and embellishments
- Long-wear product layering and targeted setting
- Photo-ready finishing and on-site touch-ups
Questions to ask when booking
- Are you licensed and background-checked?
- Do you carry allergen-safe and patch-tested adhesives?
- What are your travel fees and service area?
- How long does the appointment run for one person vs. a group?
- Do you offer on-site touch-ups during the event?
For mobile makeup at work events or large group bookings, a vetted pro saves hours of coordination and delivers consistent results across every person in the party. See examples of mobile makeup services for a sense of what different event types look like in practice.
Key Takeaways
Fairy makeup works best when you prioritize luminosity over coverage, layer sheer products, and plan gem placement before you start.
| Point | Details |
|---|---|
| Dewy skin is the foundation | Mix a liquid illuminator into your base; avoid heavy powder to keep the glass-skin effect intact. |
| Cosmetic-grade glitter only | Craft glitters have sharp edges that can scratch the cornea — always check the label before use near eyes. |
| Placement drives the look | Cheekbone clusters, temple arcs, and inner-corner gems photograph best when positioned at natural light-catch points. |
| Layer for longevity | Grip primer, cream products, targeted powder, and a long-hold setting spray keep the look intact for multi-hour events. |
| VÉLOURA Beauty On Demand | For bridal parties, photoshoots, or prosthetic work, book a vetted licensed pro through VÉLOURA Beauty On Demand. |
The mistake that ruins most fairy looks (and how to fix it)
The single most common error isn't a product choice. It's precision. Most people approach fairy makeup the way they'd approach a cat eye: sharp edges, defined lines, controlled placement. That approach works against the look entirely.
Fairy makeup is built on atmosphere, not accuracy. The enchanted quality comes from edges that dissolve, colors that bleed softly into each other, and shimmer that looks like it landed on your face rather than was placed there. The moment you reach for a sharp liner or try to cut a clean crease, you've lost the effect.
The fix is simple: after every blending step, take a clean brush with zero product and sweep it over the edges. That one habit erases hard lines and gives the watercolor quality that defines the style. It works on eyeshadow, blush, and even glitter edges.
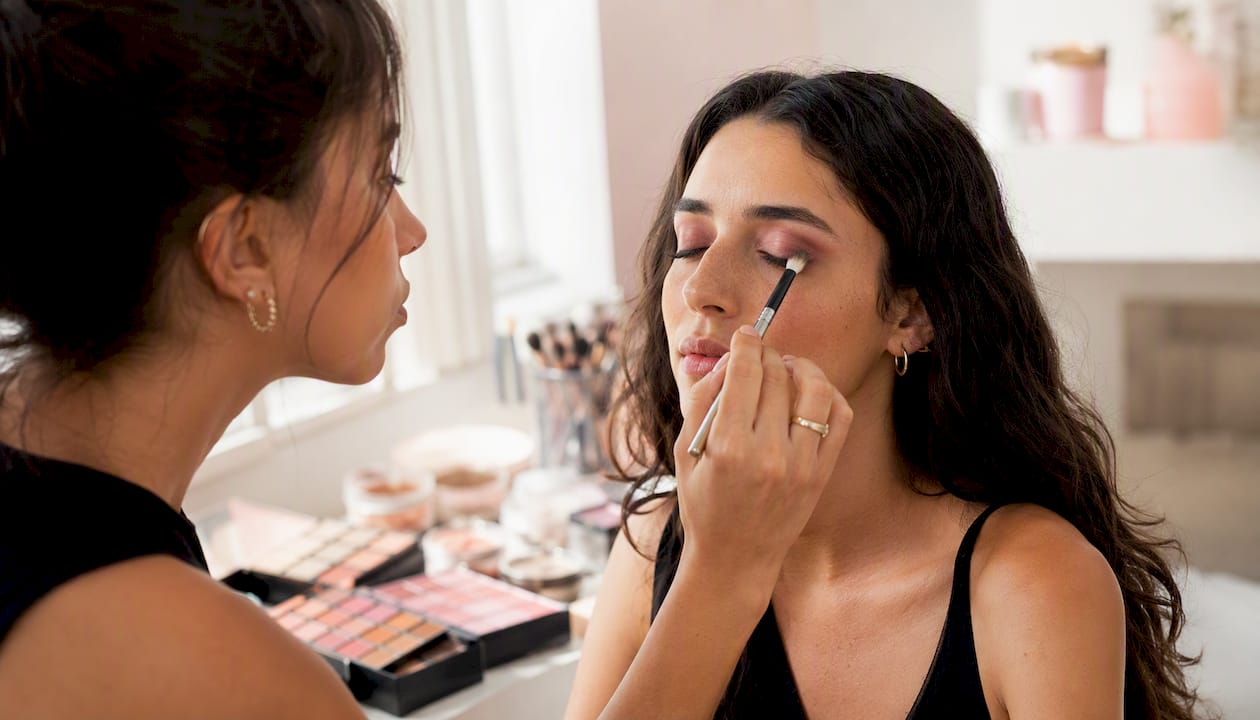
The second mistake is over-powdering. Heavy powder flattens the reflective particles in highlighters and iridescent shadows. Use it only where you genuinely need oil control, and press it on rather than sweeping it across the whole face.
For skin tone and face shape adaptations: deeper skin tones look stunning with warm bronze and gold iridescence rather than icy silver, which can read ashy. For rounder face shapes, concentrate gems and glitter at the temples and brow bone rather than the center of the cheeks — this draws the eye upward and adds length. For narrower faces, a cheekbone cluster adds width in the most flattering way.
Want a pro to create your fairy look?
Licensed professionals who specialize in fantasy and event makeup are available through VÉLOURA Beauty On Demand — and they come to you. No salon commute, no waiting room. A vetted, background-checked makeup artist arrives at your home, hotel, or event venue with professional-grade tools, cosmetic-safe adhesives, and the product knowledge to build a look that lasts.

VÉLOURA Beauty On Demand serves clients in Los Angeles, New York City, and Miami — covering everything from single-person party bookings to full bridal party and wedding beauty services. For prosthetic work, extensive gemwork, or any multi-person booking, hiring a pro is the practical choice. Book your appointment through the VÉLOURA app or visit the website to check availability in your city.
Useful sources
| Resource | What it covers |
|---|---|
| Lipstick Queen: Fairy Makeup Looks | Style definitions, layering technique, and safety guidance |
| ĀTHR Beauty: 4 Ethereal Fairy Looks | Variation recipes and diffused-edge technique advice |
| Lemon8: Blue Fairy Makeup Step-by-Step | Practical light-blue fairy tutorial with product layering tips |
| Today.com: 17 Fairy Makeup Tutorials | Editorial roundup of beginner-to-advanced tutorials |
| Coloured Contacts: Fairy Makeup with Contacts | Cosplay augmentations, prosthetic adhesive cautions |
| Charlotte Tilbury: Halloween Makeup Tutorials | Occasion-based product tutorials and dramatic look guidance |
Additional resources:
- Fairy Makeup Looks: Enchanting & Magical Styles
- Fairy Makeup Looks: 4 Ethereal Makeup Ideas to Recreate – ĀTHR Beauty
- Blue Fairy Makeup Look: Easy Light Blue Eyes + Glitter “Fairy Dust” (Step-by-Step)
- Halloween makeup ideas: 17 magical fairy makeup tutorials
- 6 Fairy Makeup Ideas With Coloured Contacts: Woodland & Dark Fairy Costumes
- HALLOWEEN makeup ideas and tutorials – Charlotte Tilbury
FAQ
What makes a makeup look "fairy"?
Fairy makeup is defined by dewy or glass skin, iridescent and shimmery finishes, soft pastel or nature-inspired color palettes, and whimsical accents like face gems, cosmetic glitter, or pressed flowers. The key technique is diffused, watercolor-like blending rather than sharp, precise lines.
How do you create a fairy face quickly?
Apply a hydrating primer, press a sheer iridescent shadow onto your lids with a fingertip, layer a liquid highlighter on cheekbone high points, and dot cosmetic-grade gems at the inner corners or temples. That four-step sequence creates a wearable fairy look quickly.
How can you make fairy makeup last all day?
Layer a grip primer under your base, use cream products for blush and highlight, seal glitter with a glitter adhesive gel, and finish with a long-hold water-resistant setting spray. For multi-hour events, a travel-sized setting spray refreshes the look without disturbing gems.
What are the most popular fairy makeup looks?
The four most popular variations are Moonlit (cool silvers and icy blues), Woodland (earthy greens and bronzes with faux freckles), Dark/Evil (smoked shimmer with deep berry tones), and Crystal/Cosmic (prismatic duochrome pigments with rhinestone clusters). Each adapts from a minimal wearable version to a full cosplay transformation.
Is it safe to use glitter near your eyes?
Only cosmetic-grade glitter is safe near the eyes. Craft glitters have sharp edges that can scratch the cornea. Always check the product label, keep loose glitter away from the waterline, and remove contact lenses before applying any glitter or gems near the eye area.